5 February 2020
AWS Cognito and JHipster for the LOVE of OAuth 2.0
tags: JHipster - AWS - AWS Cognito - OAuth2
OAuth 2.0 is a stateful security mechanism. OpenID Connect (OIDC) is an authentication layer on top of OAuth 2.0. Spring Security provides excellent OAuth 2.0 and OIDC support and is leveraged by JHipster. If you’re not sure what OAuth and OpenID Connect (OIDC) are, please see What the Heck is OAuth?.
JHipster gives you the option of using one of two OpenID Connect servers: Keycloak which is the default and Okta. If Keycloak is used, you will have to make sure that it is always up and running or it will be impossible to login into your JHipster application. Okta takes care of the hosting part so you don’t have to worry on the availability of your OpenID Connect server.
An alternative to Okta is to use AWS Cognito. This can make your development easier if your whole architecture is running on AWS. For example, you can trigger Lambdas on specific events (ex: when a user is confirmed) or link a user’s group with an IAM role. In this blog, I will explain how a JHipster application can be configured to use AWS Cognito instead of Okta/Keycloak. All the working code is accessible at this GitHub repository.
Application Generation
I decided to generate a standard JHipster application that uses OAuth 2.0/OIDC for the authentication. After installing JHipster, you just have to run jhipster and use the default values except for the authentication question:

This .yo-rc.json can be used in case you want to generate the same application referenced in this article. The file is placed in the application directory and then running jhipster will generate the application without asking any questions.
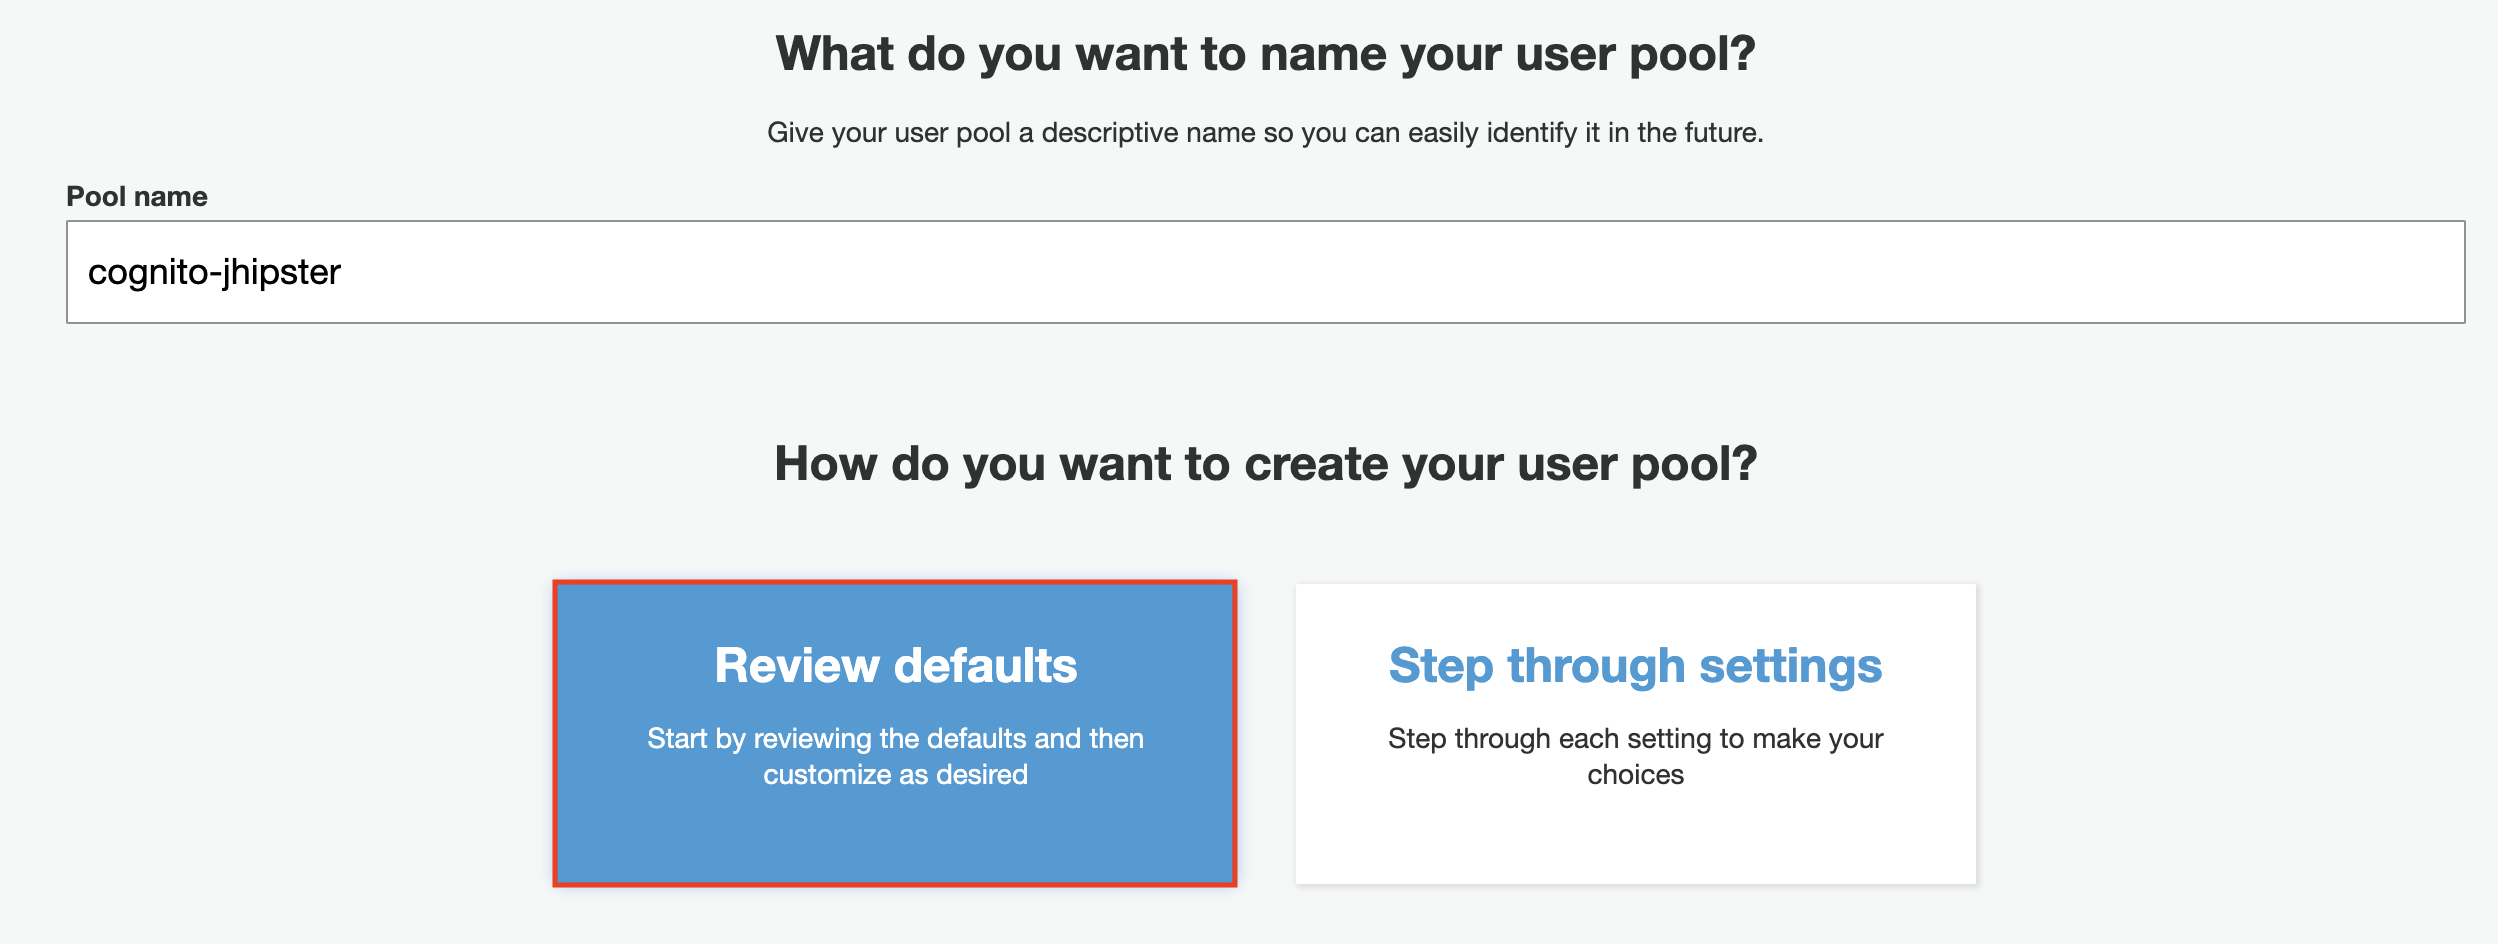
User Pool Creation
After you log in to the AWS Management Console, go to the Cognito service and click on Create a user pool. A user pool with the default configuration like below is required:
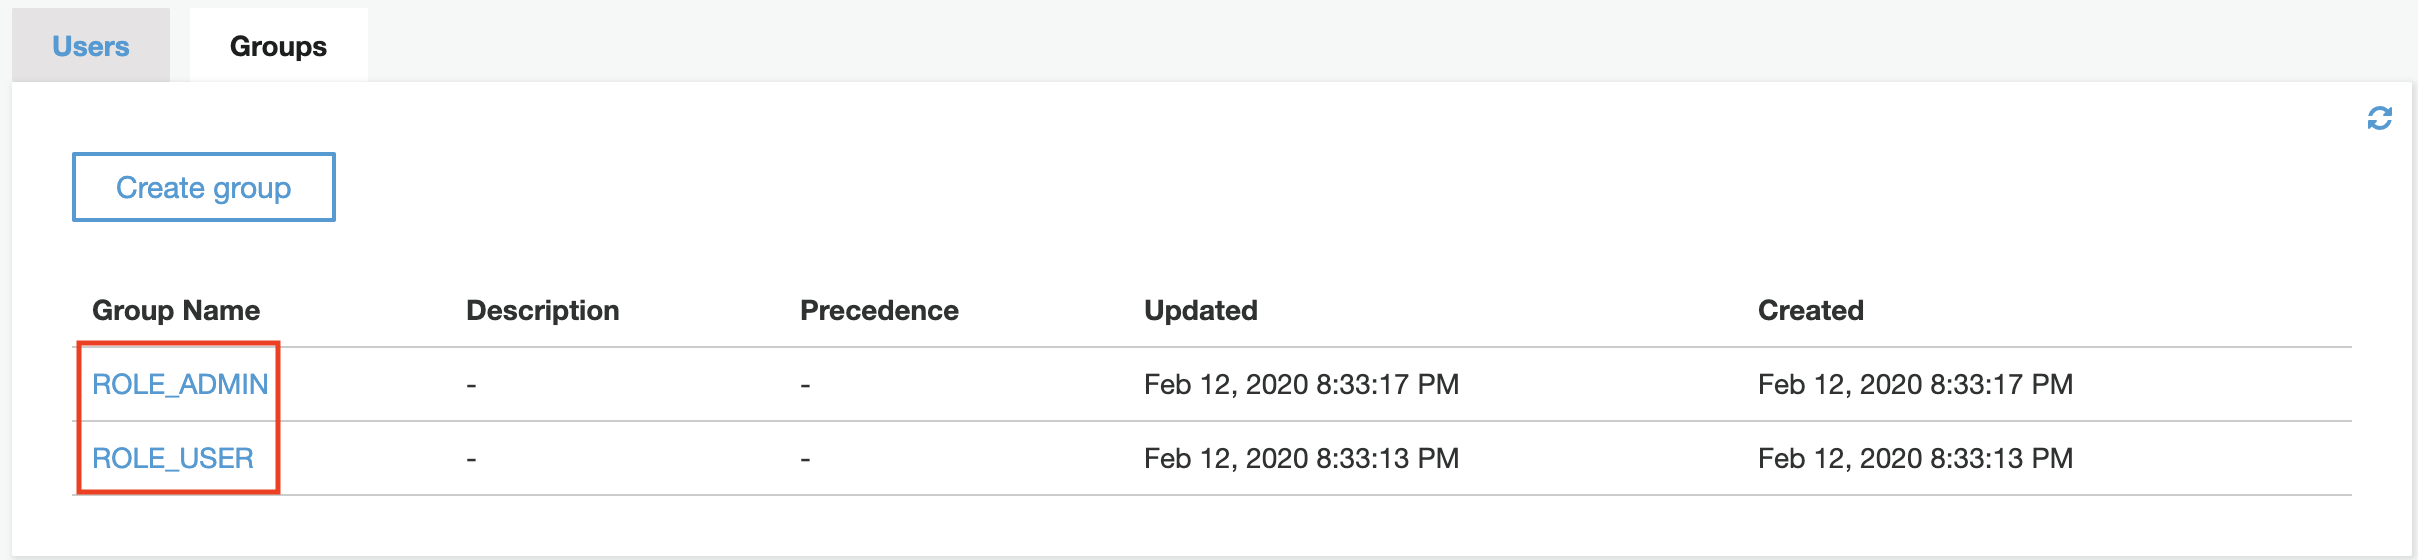
Add Users and Groups
JHipster uses two groups that must be added to the user pool: ROLE_USER and ROLE_ADMIN:
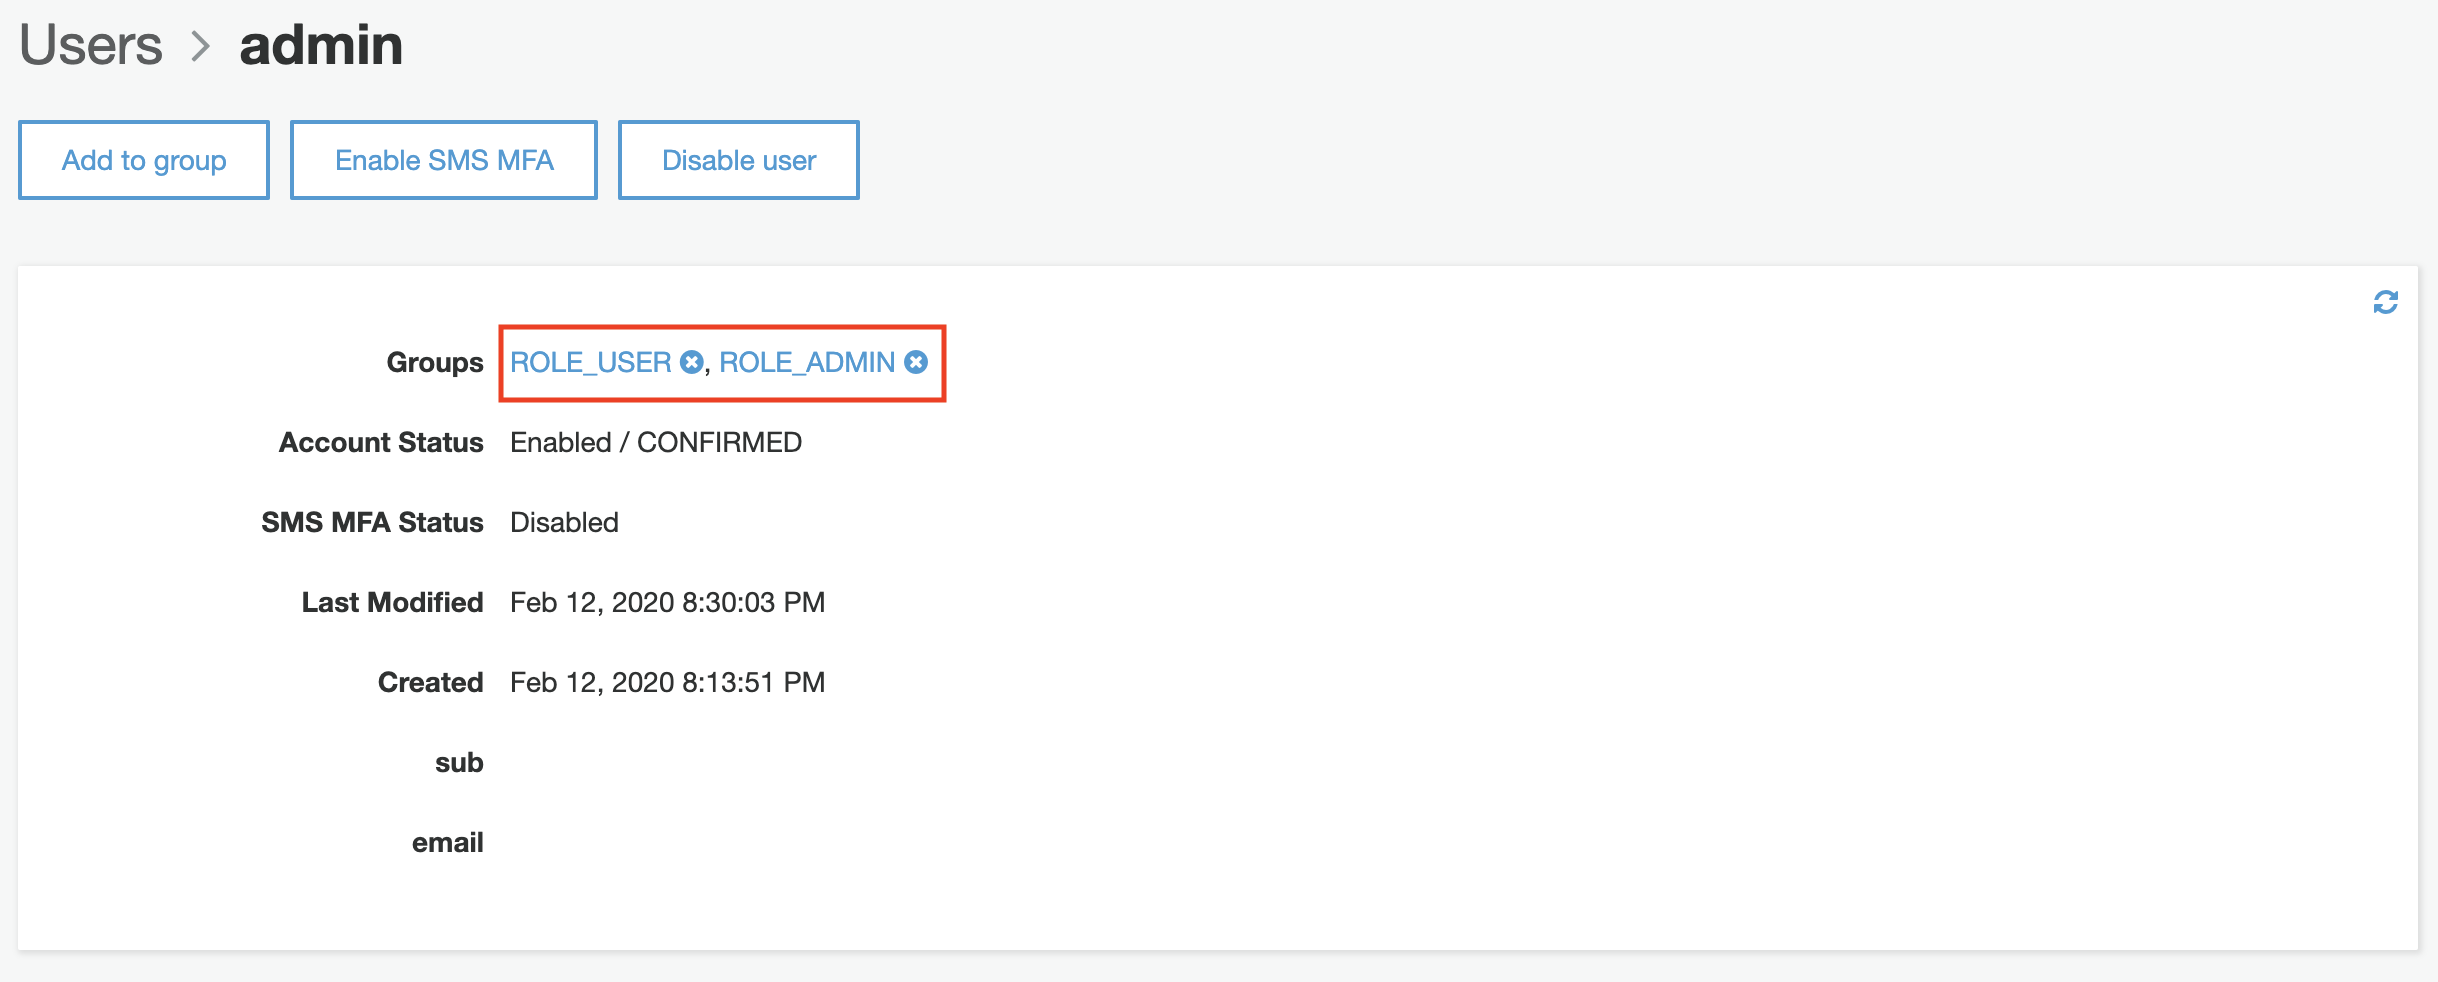
After creating the two groups, an admin user can be created in order to access the application. Don’t forget to assign the user to each group!
Create an App Client and Domain
The last step is to create an application client that will be used by the JHipster app. It is required to allow people to authenticate using users created in the user pool. An app client with the default parameters can be created:
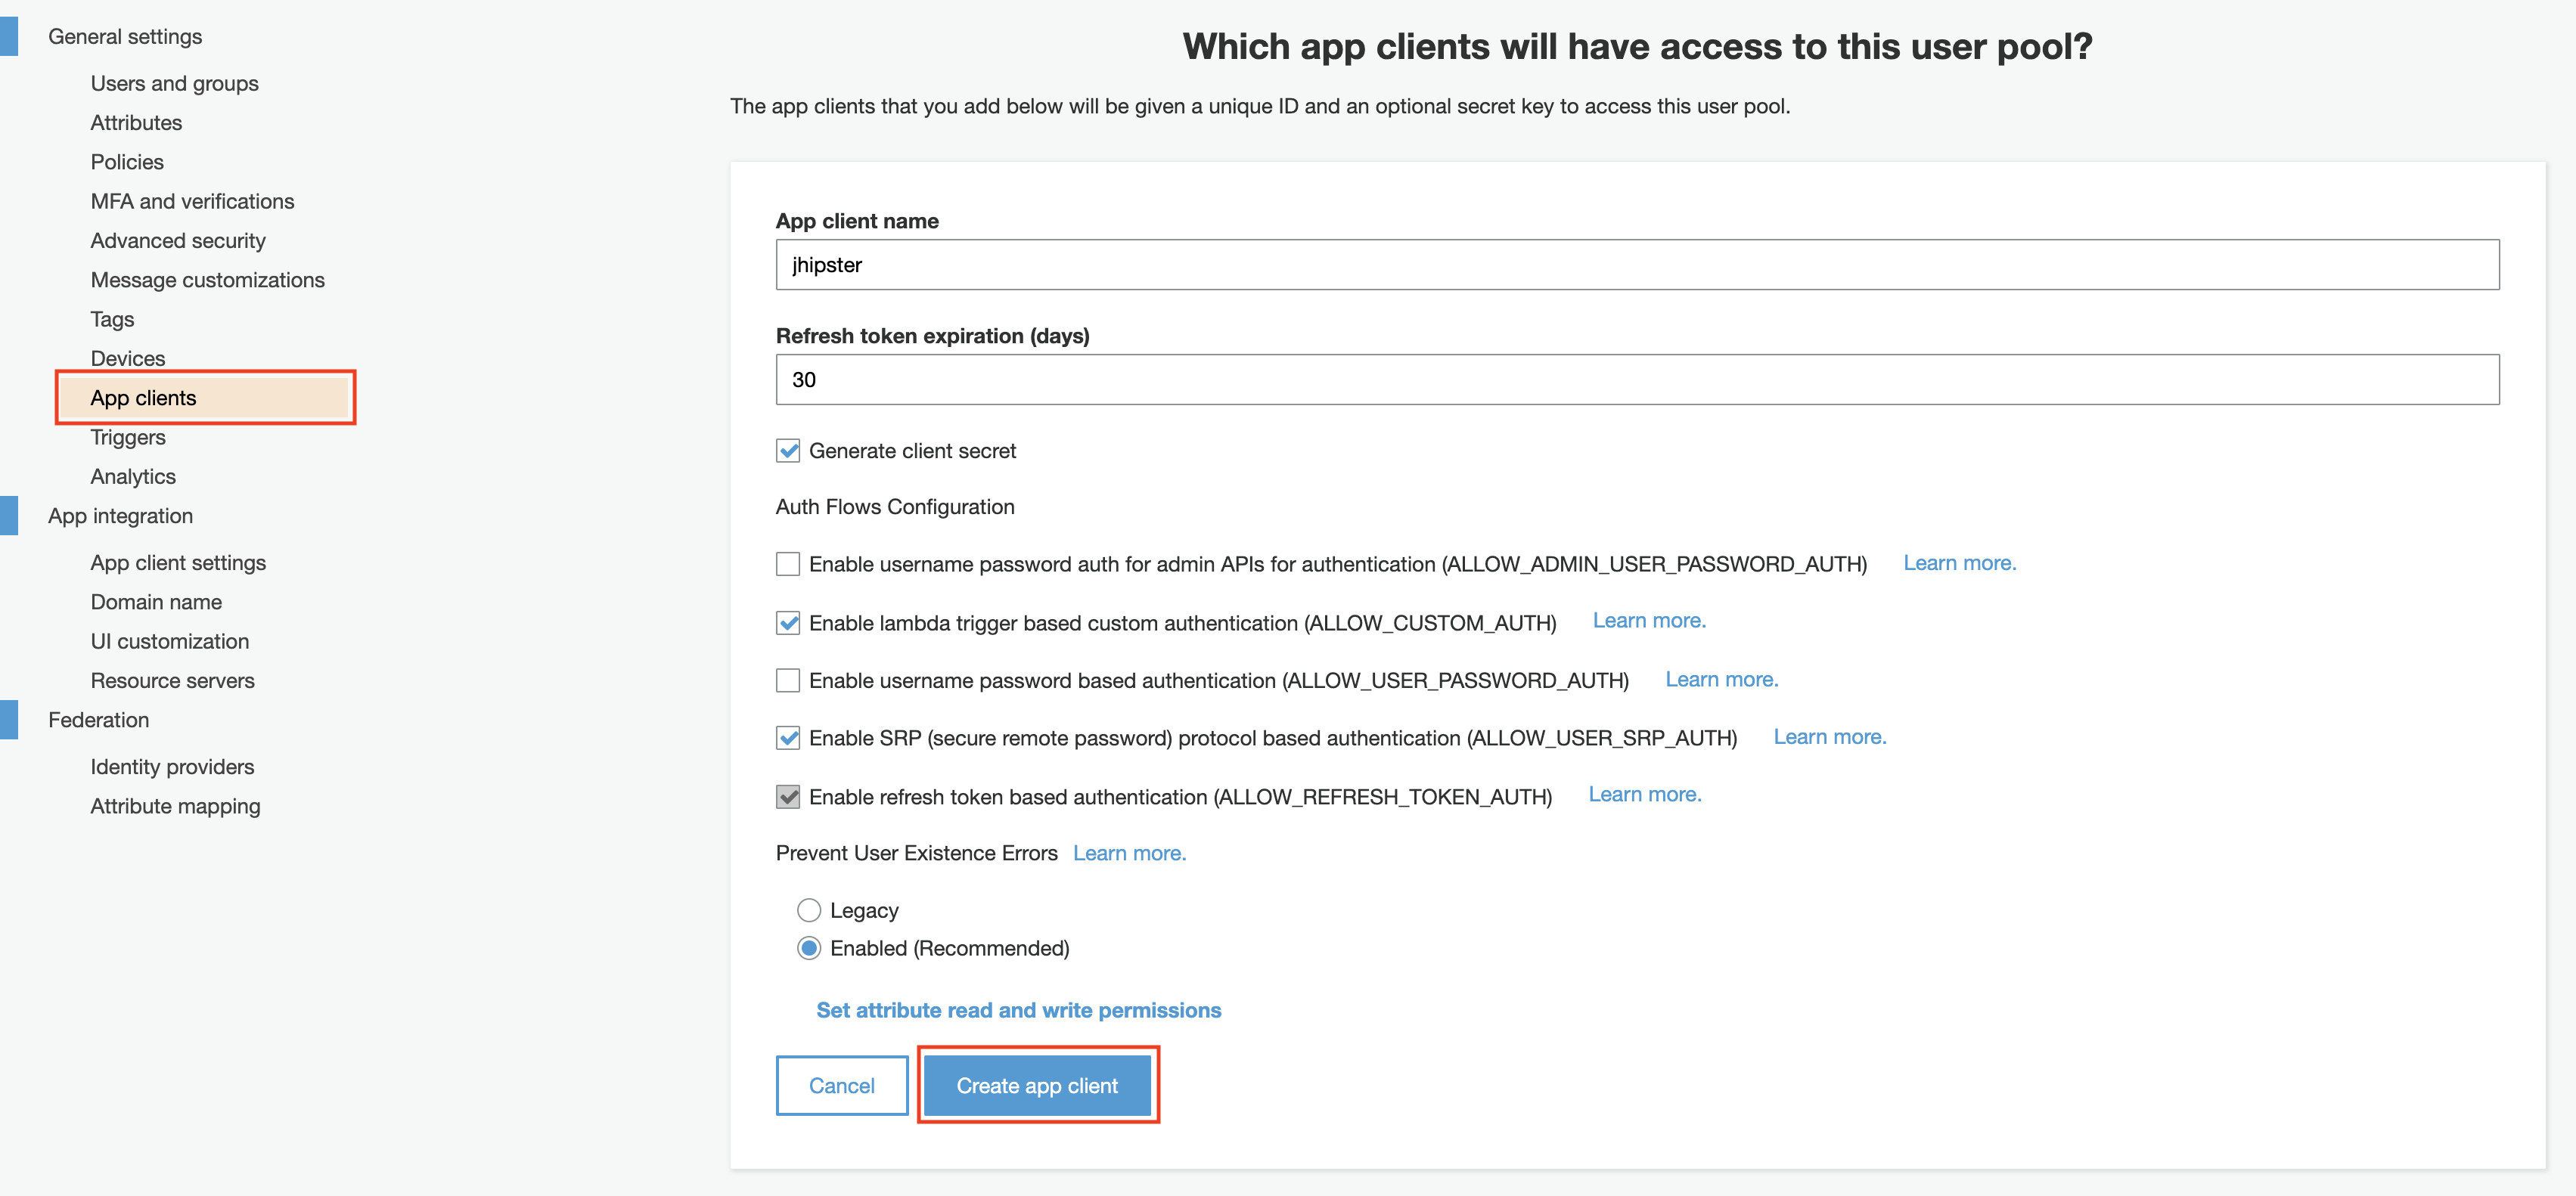
The app client id and secret are required by the JHipster app. Don’t share them or push them to a public repository. I recommend using a secrets manager for this. Keep in mind that secrets cannot be changed after an app is created. You can create a new app with a new secret if you want to rotate the secret that you are using.
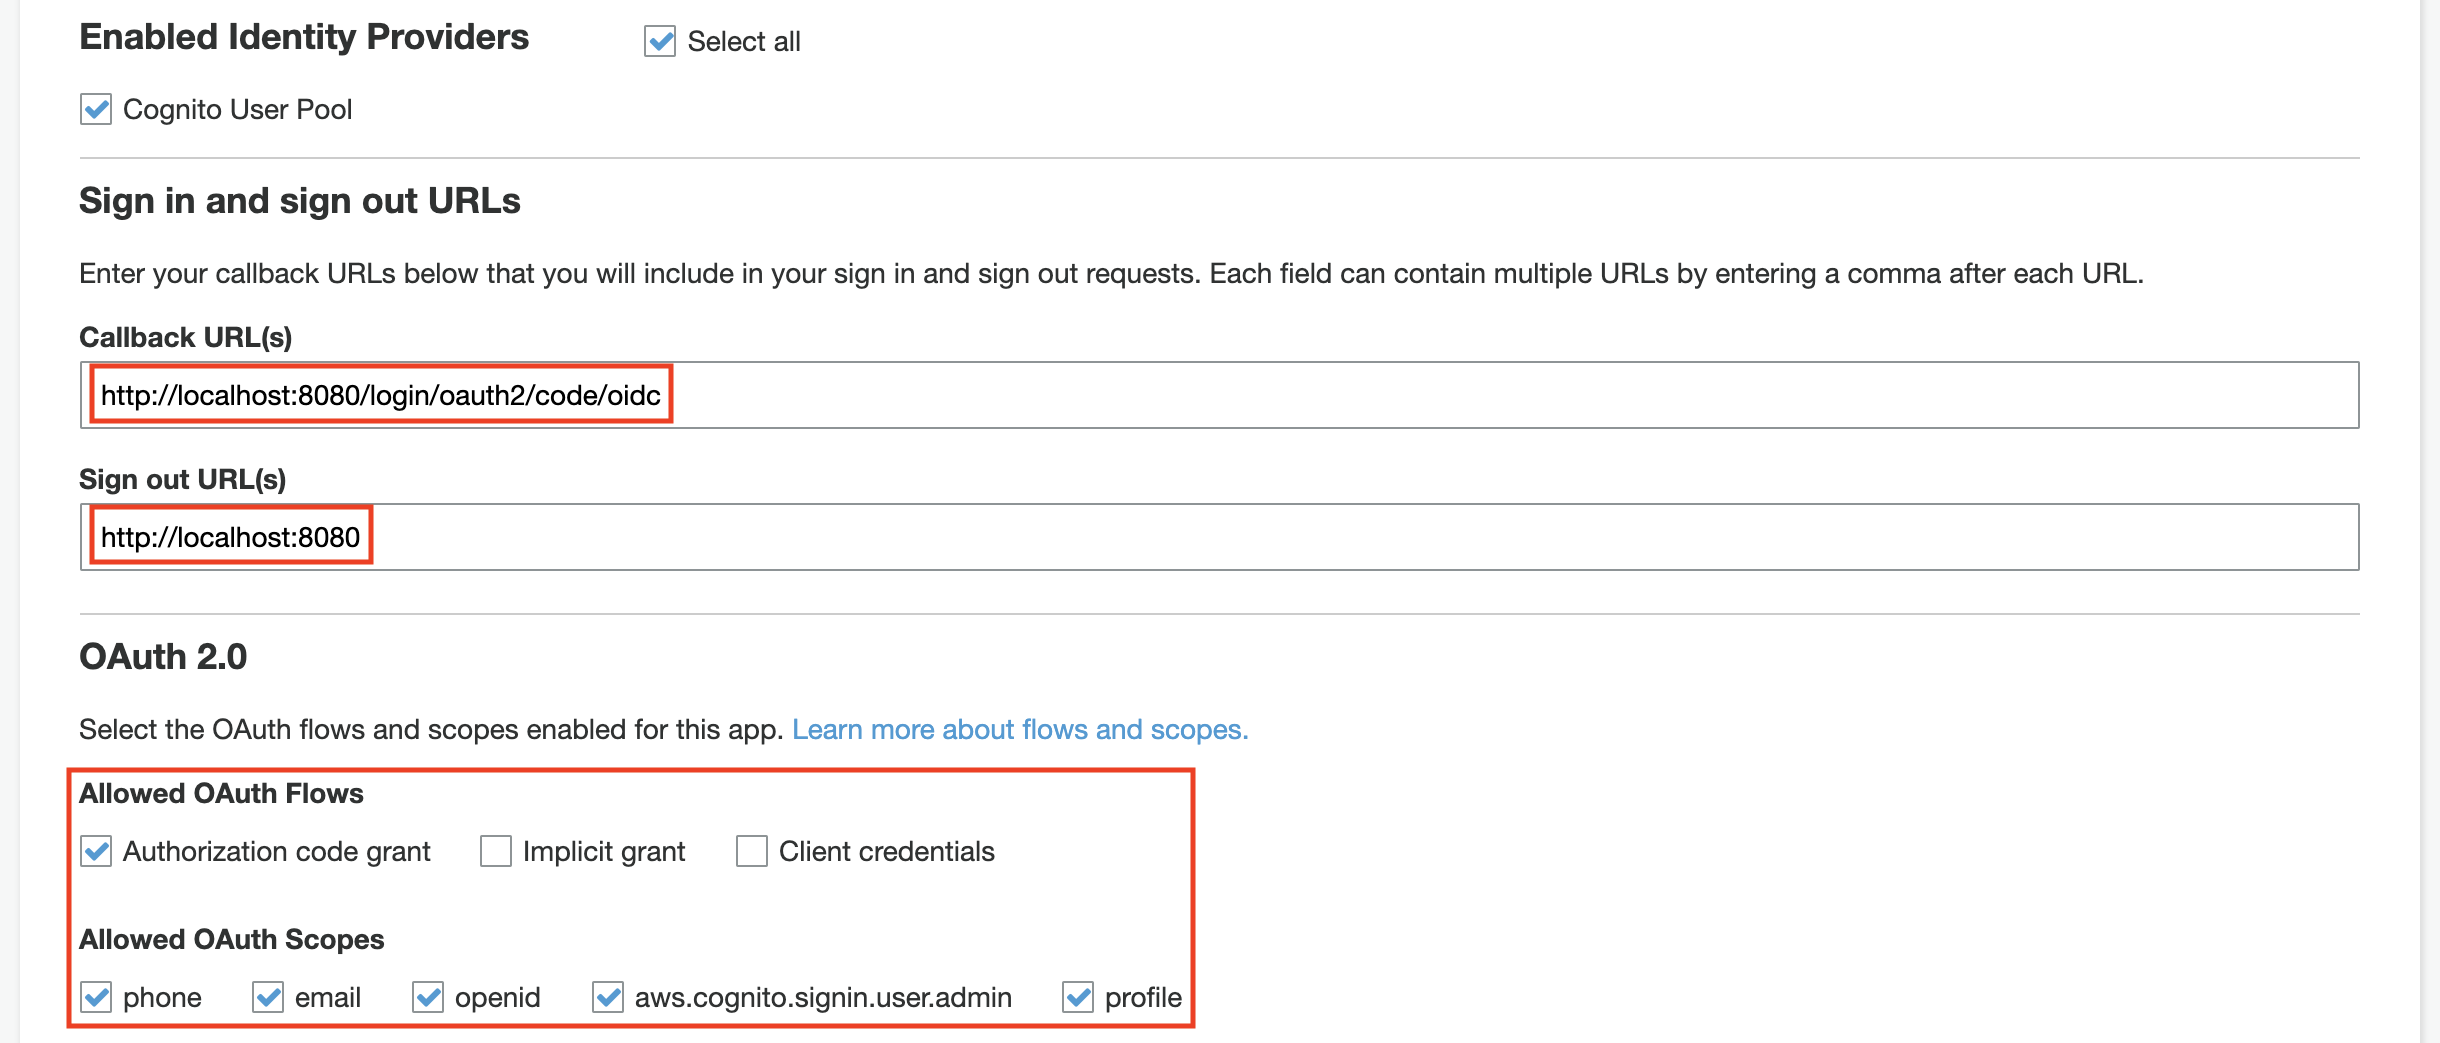
The callback, sign-out URL, and the allowed OAuth Flows/Scopes need to have the values below:
Finally, a domain is required in order to have the login flow working. You can configure the domain in the Domain name section (you can create or use your own domain).

Code Changes
Secrets
The first thing to do is to replace the client-id and client-secret with the correct values in src/main/resources/config/application.yml. Those secrets can be viewed in the App clients section:

Then the issuer-uri must be updated with the correct URI: https://cognito-idp.REGION.amazonaws.com/POOL_ID (the pool id can be viewed in the General settings section).

Roles
The way JHipster extracts the roles from the token doesn’t work for Cognito since they are stored in the cognito:groups attribute. This commit contains the changes that will make the roles extraction works.
Login and Logout Fixes
The method getUser in UserService.java extracts the information from the Cognito’s token and saves it to the local database. The login value is not set correctly and uses the id of the user instead of the email. A simple override with the email value fixes the issues, more details can be found on this commit.
The last fix is related to the logout since JHipster generates the logout URL for Okta/Keycloak, but not for Cognito. The correct URL is formatted as: https://DOMAIN.auth.REGION.amazoncognito.com/logout, this commit changes how the URL is retrieved (don’t forget to replace DOMAIN and REGION in src/main/java/com/mycompany/myapp/web/rest/LogoutResource.java).
Conclusion
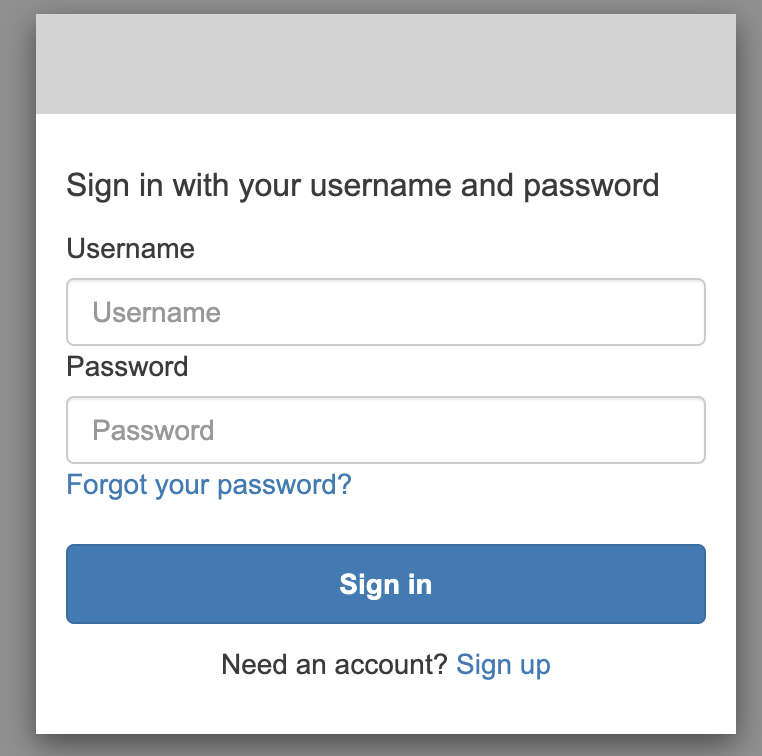
Finally, start the application with ./mvnw. After clicking on sign in you should see the Cognito login screen. Make sure the logout flow works as well:
To resume, the AWS Cognito integration with JHipster is simple and doesn’t require significant change. It is a good alternative to Keycloak, especially if you don’t want to take care of hosting your own identity management solution. I have used both Okta and AWS Cognito. However, I don’t recommend one over the other, as it depends on your specific needs and architecture. To keep things streamlined, Cognito would likely be the simpler pick if your architecture is fully hosted on AWS.
Need help using the latest authentication technology? Or do you need help modernizing your legacy systems to use these new tools? Ippon can help! Send us a line at contact@ippon.tech.